Your work life is about to become a lot more organized.
1
Upload a photo for your Profile
Go to Settings, Profile, click the “+” sign to add

2
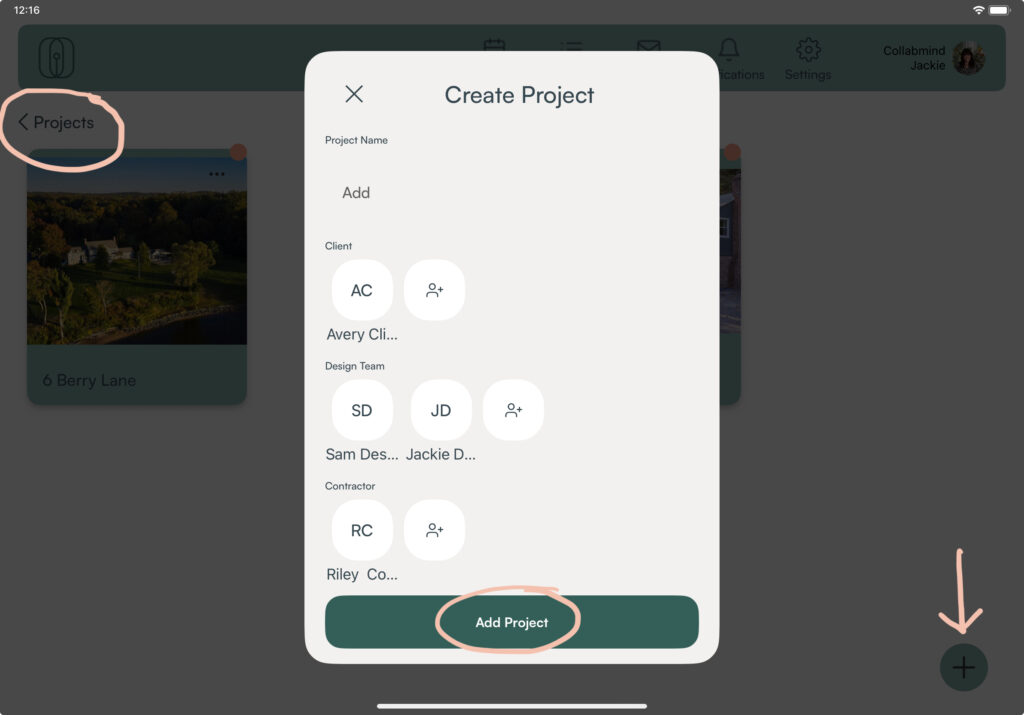
Start a Project
Within Projects, click the “+” sign to add new. Name the project, add collaborators (don’t worry this can also be done later), add your project placeholder image, and “Add Project” to save.
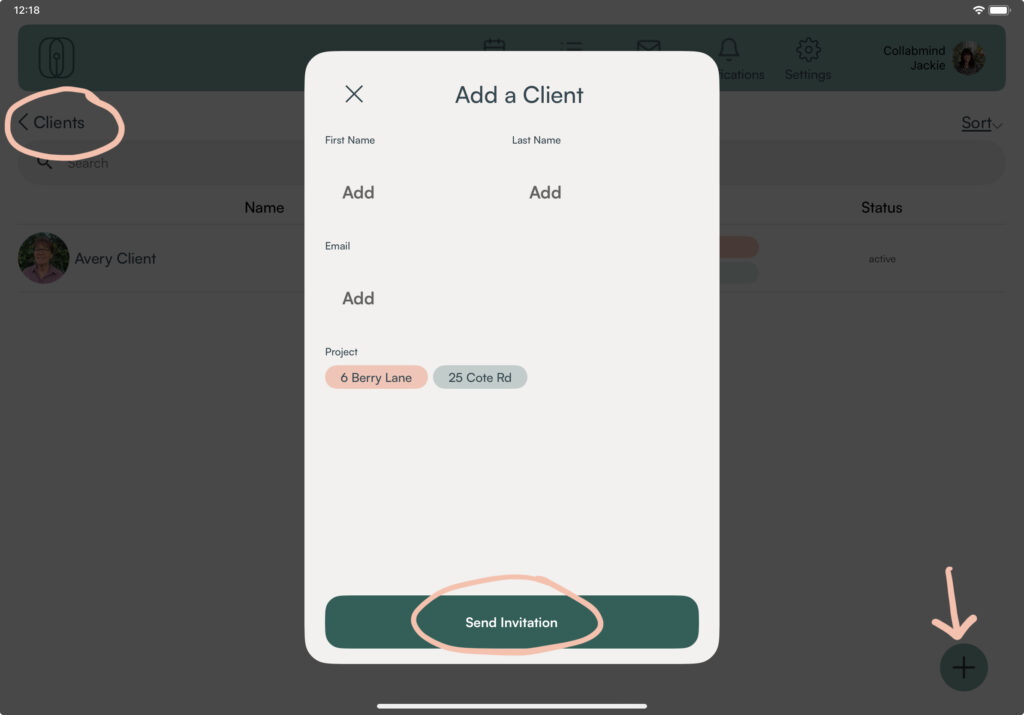
3
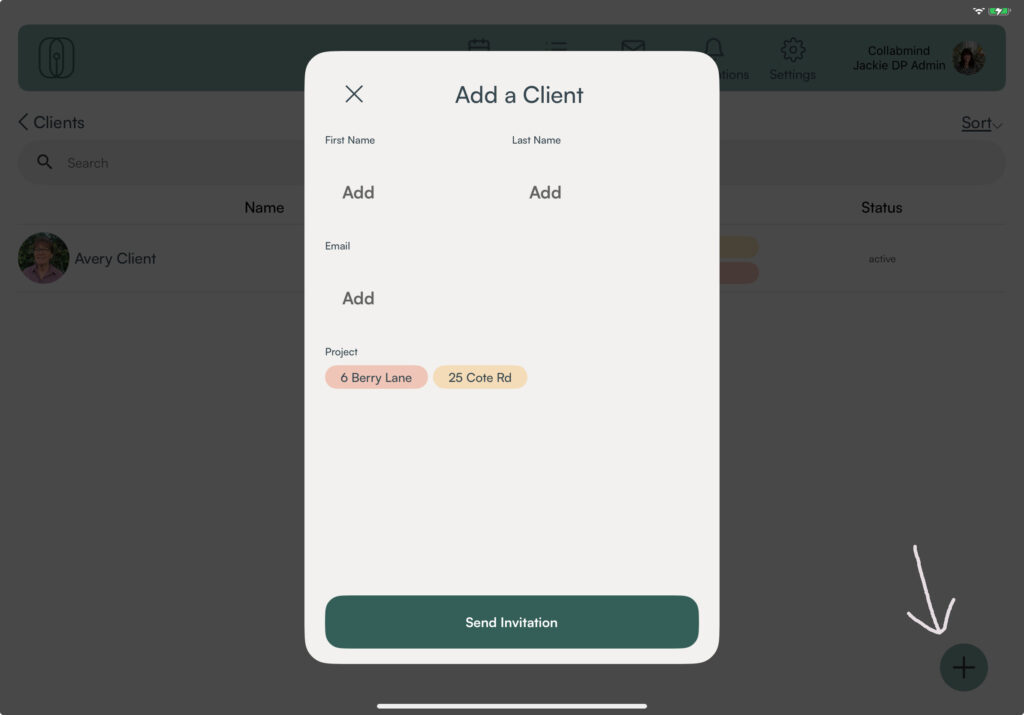
Invite Collaborators
Within Clients or Contractors, click the “+” sign to add new. Provide the name and email, then “Send Invitation”. The Collaborator will add additional information like their photo and phone number when they sign in.
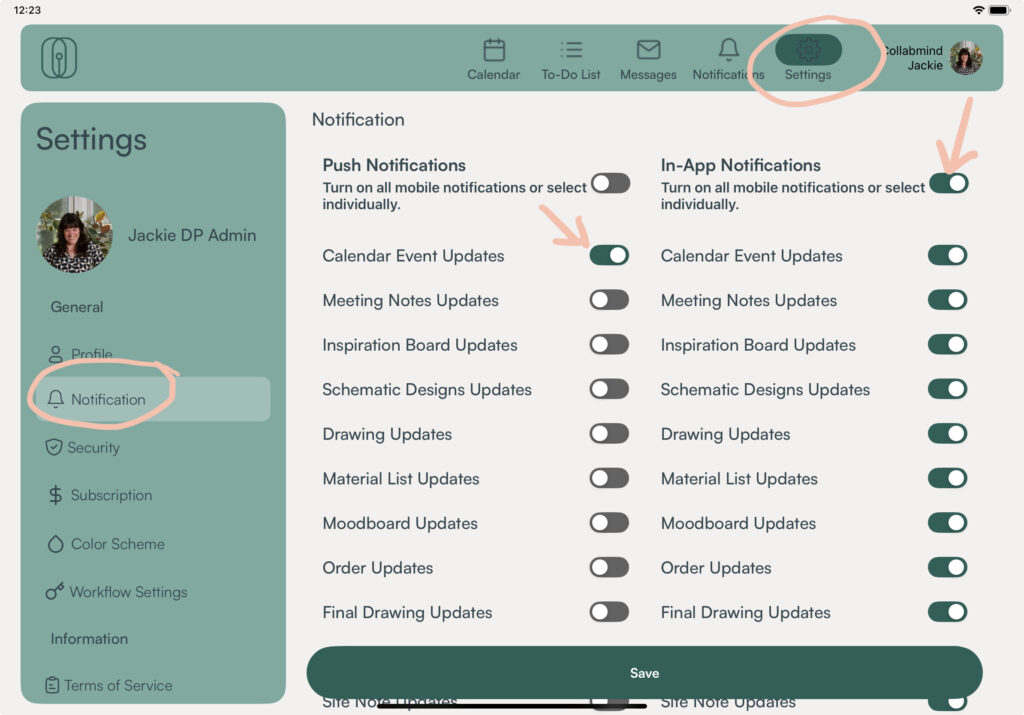
4
Set Your Desired Notifications
In Settings, toggle to Notifications in the side bar. Decide if and how you’d like to be notified for various activity. You can choose holistically or individually to be notified by Push (text) message, In-app, or by Email.
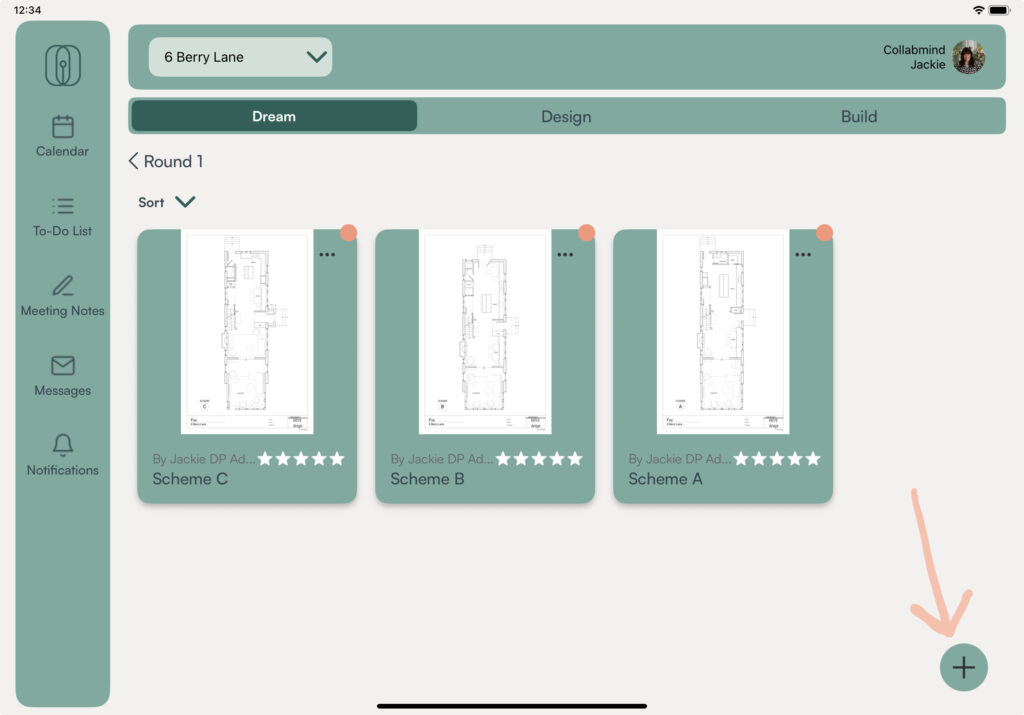
“+” sign throughout is to add a new item
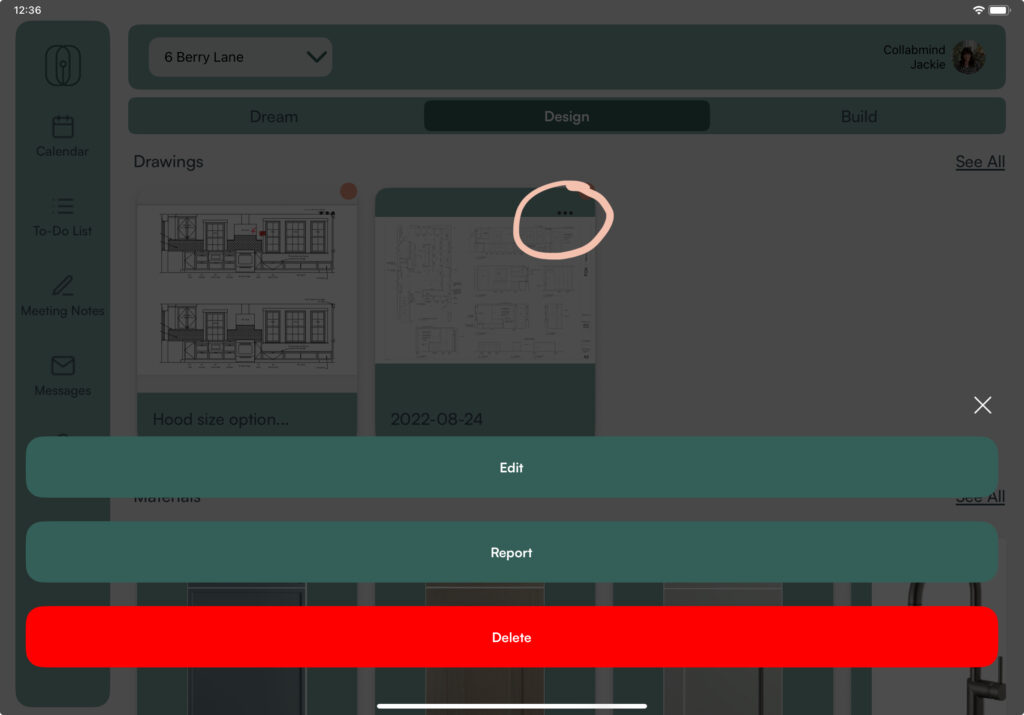
3 dots opens up secondary options menu
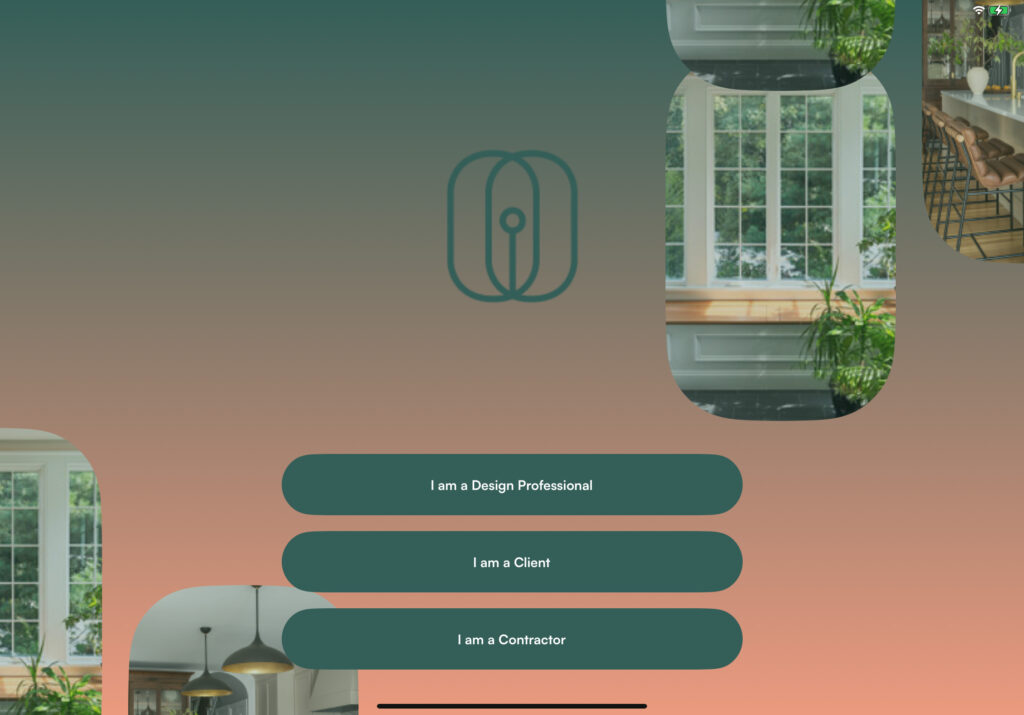
In any of the three user categories – Design Professional, Client, Contractor – hit the “+” button to add a user. Enter their info and select which projects they should have access to.

Once they’ve downloaded CollabMind from the App Store or Google Play Store, they’ll be taken to the main log-in screen. For their first use they will want to “Sign Up”.
The role should correspond with the one you assigned them.
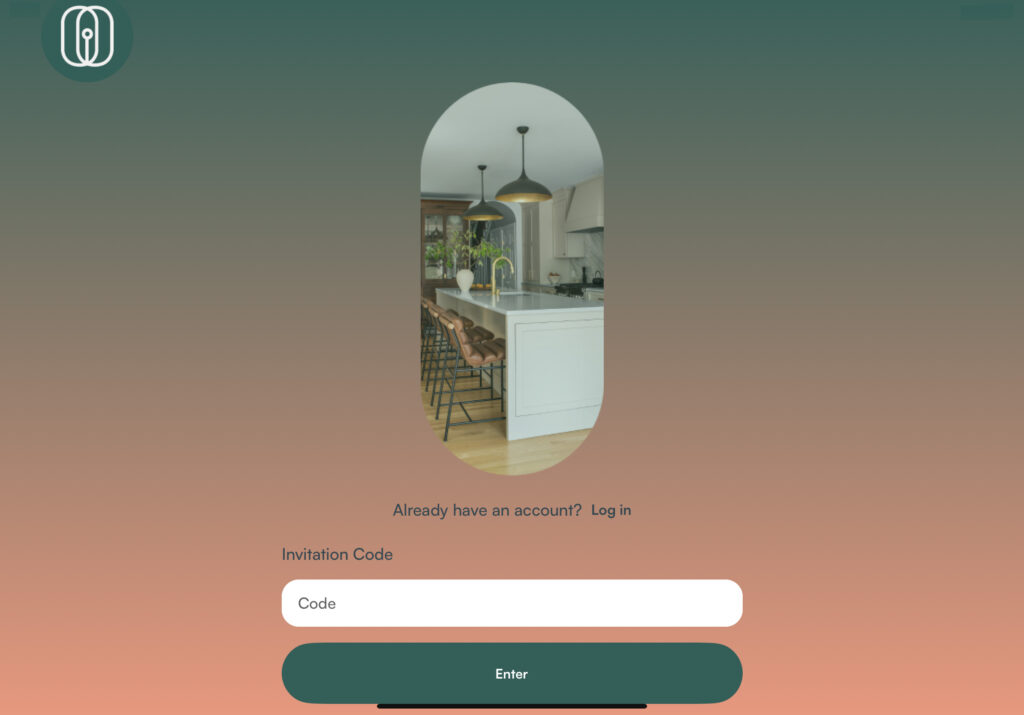
When you invited them through the app, an email was sent directly to them with an invitation code. This is what they will enter at this screen to gain access to the project.